1. About
Opush is a free (as in beer and as in speech) ActiveSync server that provides access to your OBM data. It synchronizes your OBM account using your device’s native applications.
With Opush, you don’t need to have any extra applications installed on your device in order to enjoy all capabilities offered by your favorite device: iPhone, iPad, Android, Windows Phone …
1.1. Synchronized Data
Opush is capable of doing bidirectional synchronization of:
-
your emails
-
your calendar events
-
your personal and shared address books
1.2. Supported Devices
Every ActiveSync client should be able to synchronize with OBM through Opush.
However, there’s a limited list of officially supported devices:
| Vendor (OS) | Model | Contacts | Agenda | |
|---|---|---|---|---|
Apple (iOS 5, iOS6, iOS7) |
iPhone, iPad |
YES |
YES |
YES |
BlackBerry (OS 10) |
Z10 |
YES |
YES |
YES |
Google (Android 4.2.1) |
Nexus 7 |
YES |
YES |
YES |
HTC (Android 2.3.3) |
Desire |
YES |
YES |
YES |
HTC (Android 2.3.5) |
Desire S |
YES |
YES |
YES |
Nokia (Windows Phone 8.0) |
Lumia 920 |
YES |
YES |
YES |
Samsung (Android 2.3) |
Galaxy S/SII |
YES |
YES |
YES |
Samsung (Android 4.1.2) |
Galaxy SII |
YES |
YES |
YES |
Samsung (Android 4.0+) |
Galaxy Note |
YES |
YES |
YES |
Samsung (Android 4.0+) |
Galaxy Nexus |
YES |
YES |
YES |
Motorola (Android 4.4.4) |
Moto G |
YES (OP-185) |
YES |
YES |
Samsung (Windows Phone 7.5) |
Omnia 7 |
YES |
YES |
YES |
1.3. Limitations
As Microsoft Exchange Server, Opush can’t go over some clients limitations (or bugs)!
Be aware that users with Android (> 4.4) have limitations on address books synchronization. Their secondary address books (others than the "contacts" one) are read-only, so please note that:
-
contacts in such address book are in a read-only state, every modification and deletion will be taken into account on your device but ignored by the server
-
dropping an address book does not remove related contacts on the device
All kind of operations are available (and encouraged) on the main address book.
2. Architecture
Opush can be seen as a connector that provides ActiveSync support to OBM.
It requires several OBM services:
-
obm-locator for locating OBM services
-
obm-sync for calendar and addressbook synchronization
-
LDAP for user lookup
-
Cyrus for email synchronization
-
Postfix for sending emails
-
Postgres as a database backend
Additionally there are some technical dependencies:
-
Cassandra for storing the internal state
-
OpenJDK 7
2.1. ActiveSync Protocol
The Microsoft definition of objects such as events, contacts or emails differ from the OBM representation. Opush closes this gap by providing an ActiveSync frontend to OBM.
For this purpose, when a synchronization request comes from a device, Opush analyzes this request, looks for OBM service locations and delegates data retrieval to Cyrus, obm-sync and/or LDAP.
It then keeps track of objects pushed to the device to handle subsequent synchronization requests. It uses Cassandra and Postgres for this purpose.
2.2. Technical Overview
Opush is a Java application using an embedded http server.
It uses a modular design that allows shifting technology without breaking the whole application every time.
Recently, Opush has changed the email backend from an in-house solution to a javax.mail based backend and then returned to an improved version of the in-house solution.
It also changed from EHCache to Cassandra for internal state storage.
We expect to continue with such breaking changes for some times, improving our capabilities such as high availability, horizontal scalability, improved management, great monitoring, and support for latest ActiveSync specifications.
3. Cassandra Setup
3.1. Requirements
-
Cassandra 2.1 or 2.0 (version >= 2.0.6)
-
At least 2GiB of RAM
-
The Cassandra cluster must be installed (guides for Debian and RHEL) and configured
| Despite what datastax documentation says, Cassandra works well on OpenJDK 7 |
3.2. Supported Cassandra Configurations
|
A single Cassandra server is enough to make Opush work but you will not have every benefit of a Cassandra cluster. If you want the strongest architecture you will have to deploy at least 3 nodes to have durability and fault-tolerance. |
3.2.1. Three Nodes (recommended)
Official instructions to setup a cluster can be found here.
You can find below an example for a three nodes cluster, only cluster_name, seeds and rpc_address fields have to be modified to get your cluster working. We will not cover advanced configuration in this documentation.
Assuming that you have three servers with IPs 192.168.56.1, 192.168.56.2 & 192.168.56.3 and you want only one seed.
3.2.2. Single Node
For small configurations you may want to install Cassandra on a single node, to understand what is going on in this situation read this article.
Assuming that your Cassandra server has the IP 192.168.56.1, modify your cassandra.yaml like this:
3.3. Authentication Configuration
3.3.1. Configure the Authentication Backend
Authentication in Cassandra must be delegated to the password authenticator backend,
you have to edit the cassandra.yaml file and check the authenticator backend:
authenticator: PasswordAuthenticatorMake the change on each node and restart them, that will create the system_auth keyspace on the cluster.
3.3.2. Configure the System Users Replication
|
We advise to replicate the
system_auth keyspace on every cluster’s node.Cassandra uses the |
Connect your Cassandra cluster from any node, and change the keyspace configuration on this node only.
Replace in the following command CLUSTER_NODE_COUNT by the cluster node count.
$ cqlsh -u cassandra -p cassandra NODE_RPC_ADDRESS
cqlsh> ALTER KEYSPACE system_auth WITH REPLICATION = {'class' : 'SimpleStrategy', 'replication_factor': CLUSTER_NODE_COUNT};
You can check the new keyspace configuration:
cqlsh> DESCRIBE KEYSPACE system_auth ;Now you have to propagate this change on every node with the nodetool binary.
If your cluster is not in a production context you can run it on every node at the same time.
Be aware that this command can be long to terminate.
$ nodetool repair system_auth3.4. Preparing for Opush
First of all, you have to create a keyspace, this must be done in the cqlsh shell with Cassandra administrator:
$ cqlsh -u cassandra -p cassandra NODE_RPC_ADDRESSA keyspace is created with a data replication configuration, to understand it please read this page.
Create it with the following command in the cqlsh shell:
cqlsh> CREATE KEYSPACE opush WITH REPLICATION = {'class' : 'CHOSEN_STRATEGY', 'replication_factor': CHOSEN_FACTOR};Where:
-
opushis the keyspace name (Opush 3.0.0 requires a keyspace named "opush", see OP-35) -
CHOSEN_STRATEGYuseSimpleStrategyunless your cluster is deployed across multiple data centers -
CHOSEN_FACTORmust be1for a single node installation, we suggest3for a three nodes cluster
Finally, still in the cqlsh shell, create a Cassandra user for Opush:
cqlsh> USE opush;
cqlsh> CREATE USER opush_user WITH PASSWORD 'opush_password' SUPERUSER;
Where:
-
opush_useris the Cassandra user for Opush -
opush_passwordis the password for this user
|
You have more than one node ?
Keyspace as user creation need to be done on one node, such changes affect the whole cluster |
4. Debian - Opush Installation
|
If you want to install Opush 3 on the same machine as OBM 2.5.X
This Opush version is compatible with OBM 2.5.X but you may run into package dependency issues.
Such OBM versions officialy support Debian Squeeze, however Opush requires
OpenJDK 7 which is only available for Wheezy. |
4.1. System Requirements
4.2. Opush on Wheezy Installation
Modify your /etc/apt/sources.list file by adding the Opush repository:
deb http://deb.obm.org/opush/stable opush opushAdd the OBM GPG public key:
$ wget -q http://deb.obm.org/obmgpg.pub -O - | apt-key add -Update the system packages list:
$ aptitude updateAnd finally, install Opush
$ aptitude install opush4.3. Opush on Squeeze Installation
|
If you have the |
Modify your /etc/apt/sources.list file by adding the Opush and squeeze-backports repositories:
deb http://deb.obm.org/opush/stable opush opush
deb http://deb.obm.org/squeeze-backports squeeze main
Add the OBM GPG public key:
$ wget -q http://deb.obm.org/obmgpg.pub -O - | apt-key add -Update the system packages list:
$ apt-get updateInstall Opush:
$ apt-get install opush4.4. Configuration with Debconf
During the installation process, you will be asked some questions:
-
Host IP address for OBM database serverYour OBM host -
Type of OBM database serverType of OBM database server -
OBM database nameOBM database name -
OBM database user nameOBM database user -
Host IP address for LDAP serverURL of the OBM LDAP (ldap://… or ldaps://…) -
External url of OBMYour OBM FQDN -
OBM database user passwordOBM database user password -
Authorize synchronization of unknown devices by defaulttrue/false -
Opush Cassandra seedsList of Cassandra seeds (IPs), separated by commas -
Opush Cassandra keyspaceCassandra keyspace for Opush -
Opush Cassandra userCassandra user for Opush -
Opush Cassandra user passwordCassandra user password for Opush
Answering these questions will modify the following configuration files:
-
/etc/opush/opush.ini -
/etc/opush/ldap_conf.ini -
/etc/opush/cassandra.ini -
/etc/opush/sync_perms.ini
4.5. Opush Cassandra Schema Setup
At this step you should have a Opush 3 and a Cassandra cluster installed and configured.
The last thing to do to have your Opush ready to use is to setup the Cassandra schema.
5. Debian - Upgrade from Opush 2
|
If you want to install Opush 3 on the same machine as OBM 2.5.X
This Opush version is compatible with OBM 2.5.X but you may run into package
dependency issues.
Such OBM versions officialy support Debian Squeeze, however Opush requires
OpenJDK 7 which is only available for Wheezy. |
5.1. System Requirements
5.2. Package Dependency Conflicts
As obm-full-2.5.X depends on opush-2.5.X, the installation of Opush 3
conflicts with obm-full-2.5.X.
obm-full is a meta-package only used to simplify installation of all OBM
packages.
If you have it installed, it will be removed automatically when upgrading to
the new version of Opush. This will not affect the functionality of OBM.
During the upgrade apt-get will ask for confirmation before removing conflicting packages. As these are dependencies of Opush 2 only, packages listed below will be removed. No other removal should be necessary.
The following packages will be REMOVED:
  jetty obm-full obm-jetty obm-jetty-common-libs
5.3. Opush on Wheezy Upgrade
Modify your /etc/apt/sources.list file by adding the Opush repository:
deb http://deb.obm.org/opush/stable opush opushUpdate system packages list:
$ aptitude updateFinally, upgrade Opush:
$ aptitude install opushYou will be asked to remove some packages:
The following NEW packages will be installed:
  ca-certificates-java{a} icedtea-7-jre-jamvm{a} libnspr4{a} libnss3{a} libpcsclite1{a} openjdk-7-jre-headless{a} openjdk-7-jre-lib{a} tzdata-java{a}
The following packages will be upgraded:
  opush{b} tzdata
2 packages upgraded, 8 newly installed, 0 to remove and 69 not upgraded.
Need to get 43.6 MB/78.6 MB of archives. After unpacking 56.9 MB will be used.
The following packages have unmet dependencies:
 opush : Conflicts: obm-jetty but 2.5.7 is installed.
         Conflicts: jetty but 6.1.26-1 is installed.
The following actions will resolve these dependencies:

     Remove the following packages:
1)     jetty
2)     obm-jetty
3)     obm-jetty-common-libs


Accept this solution? [Y/n/q/?]
Go ahead and accept this solution by answering with Y.
Afterwards, accept the newly installed packages:
The following NEW packages will be installed:
  ca-certificates-java{a} icedtea-7-jre-jamvm{a} libnspr4{a} libnss3{a} libpcsclite1{a} openjdk-7-jre-headless{a} openjdk-7-jre-lib{a} tzdata-java{a}
The following packages will be REMOVED:
  jetty{a} jsvc{u} libcommons-daemon-java{u} libjetty-java{u} libservlet2.5-java{u} libslf4j-java{u} obm-jetty{a} obm-jetty-common-libs{a} spushnik{a}
The following packages will be upgraded:
  opush tzdata
2 packages upgraded, 8 newly installed, 9 to remove and 68 not upgraded.
Need to get 43.6 MB/78.6 MB of archives. After unpacking 30.3 MB will be used.
Do you want to continue? [Y/n/?]
5.4. Opush on Squeeze Upgrade
Modify your /etc/apt/sources.list file by adding the Opush and squeeze-backports repositories:
deb http://deb.obm.org/opush/stable opush opush
deb http://deb.obm.org/squeeze-backports squeeze main
Update the system packages list:
$ apt-get updateobm-full package installedTo upgrade Opush when you have obm-full installed, please read the Package Dependency Conflicts to understand what will be done with your
OBM packages.
To resolve conflicts properly use apt-get instead of aptitude and install
explicitly every obm-full dependency to be sure to keep everything.
$ apt-get install opush obm obm-filter obm-satellite obm-sync obm-storage obm-ldap obm-ui obm-cyrus obm-postfix obm-services obm-locator obm-solr$ apt-get install opush5.5. Configuration with Debconf
During the installation process, you will be asked some questions:
-
Authorize synchronization of unknown devices by defaulttrue/false -
Opush Cassandra seedsList of Cassandra seeds (IPs), separated by comas -
Opush Cassandra keyspaceCassandra keyspace for Opush -
Opush Cassandra userCassandra user for Opush -
Opush Cassandra user passwordCassandra user password for Opush
Answering these questions will modify the following configuration files:
-
/etc/opush/cassandra.ini -
/etc/opush/sync_perms.ini
5.6. Opush Cassandra Schema Setup
At this step you should have a Opush 3 and a Cassandra cluster installed and configured.
The last thing to do to have your Opush ready to use is to setup the Cassandra schema.
6. RHEL/CentOS - Opush Installation
6.1. System Requirements
6.2. Repository Configuration
In order to add the Opush RPM repository declaration, create the file /etc/yum.repos.d/opush.repo and add the following lines:
[opush]
name=opush
baseurl=http://rpm.obm.org/opush/stable/$releasever
enabled=1
gpgcheck=0
6.3. Opush Installation
$ yum install opush6.4. Configuration
6.4.1. Configuration of the Communication with OBM Components
Main Configuration
|
Opush reads its configuration from |
If you need to edit the main configuration file, here is the information it contains:
/etc/opush/opush.ini#
# Locator & Database URL
#
host=@DBHOST@
#
# Database section
#
# DB type MYSQL, PGSQL
dbtype=@DBTYPE@
# Database name
db=@DBNAME@
# DB user
user=@DBUSER@
# DB user password
password=@DBPASSWORD@
# OBM external URL
external-url=@EXTERNALURL@
#
# Transaction timeout section
#
# Transaction timeout
transaction-timeout=1
# Transaction timeout unit (milliseconds, seconds, minutes, hours)
transaction-timeout-unit=minutes
# Default window size
window-size=50
# Max window size, no value by default
#window-size.max=100The following variables have to be filled:
-
@DBHOST@: Your OBM host -
@DBTYPE@:PGSQLorMYSQL(OBM database kind) -
@DBNAME@: OBM database name -
@DBUSER@: OBM database user -
@DBPASSWORD@: OBM database user password -
@EXTERNALURL@: Your OBM FQDN
LDAP Configuration
You have to edit the LDAP configuration file:
/etc/opush/ldap_conf.inisearch.ldap.filter=(&(objectClass=inetOrgPerson) (|(mail=%q*)(sn=%q*)(givenName=%q*)))
search.ldap.url=@LDAPSERVER@
search.ldap.basedn=dc=%d,dc=local
# search.ldap.limit=100And then replace the default value:
-
@LDAPSERVER@: URL of the OBM LDAP server (ldap://… or ldaps://…)
See LDAP for more information.
6.4.2. Configuration of the Cassandra Connection
Opush needs additional configuration in order to connect to Cassandra.
You have to edit the Cassandra configuration file:
/etc/opush/cassandra.inicassandra.seeds=@SEEDS@
cassandra.keyspace=@KEYSPACE@
cassandra.user=@USER@
cassandra.password=@PWD@
# Retry policy values: ALWAYS_RETRY (default), RETRY_OR_CL_DOWNGRADE
#cassandra.retry-policy=ALWAYS_RETRY
# Maximum number of retry (default 3)
#cassandra.max-retries=3And then replace values as followed:
-
@SEEDS@: List of Cassandra seeds (IPs), separated by comas -
@KEYSPACE@: Cassandra keyspace for Opush -
@USER@: Cassandra user for Opush -
@PWD@: Cassandra user password for Opush
6.5. Opush Cassandra Schema Setup
At this step you should have a Opush 3 and a Cassandra cluster installed and configured.
The last thing to do to have your Opush ready to use is to setup the Cassandra schema.
6.6. Opush Restart
$ service opush restart6.7. Opush Service Activation on Boot
$ chkconfig opush on7. RHEL/CentOS - Upgrade from Opush 2
7.1. System Requirements
7.2. Repository Configuration
In order to add the Opush RPM repository declaration, create the file /etc/yum.repos.d/opush.repo and add the following lines:
[opush]
name=opush
baseurl=http://rpm.obm.org/opush/stable/$releasever
enabled=1
gpgcheck=0
7.3. Opush Installation
First of all, you have to remove legacy components:
$ yum remove jetty6
$ yum remove obm-jetty
And finally, upgrade Opush:
$ yum install opush7.4. Configuration
7.4.1. Configuration of the Communication with OBM Components
Main Configuration
|
Opush reads its configuration from |
If you need to edit the main configuration file, here is the information it contains:
/etc/opush/opush.ini#
# Locator & Database URL
#
host=@DBHOST@
#
# Database section
#
# DB type MYSQL, PGSQL
dbtype=@DBTYPE@
# Database name
db=@DBNAME@
# DB user
user=@DBUSER@
# DB user password
password=@DBPASSWORD@
# OBM external URL
external-url=@EXTERNALURL@
#
# Transaction timeout section
#
# Transaction timeout
transaction-timeout=1
# Transaction timeout unit (milliseconds, seconds, minutes, hours)
transaction-timeout-unit=minutes
# Default window size
window-size=50
# Max window size, no value by default
#window-size.max=100The following variables have to be filled:
-
@DBHOST@: Your OBM host -
@DBTYPE@:PGSQLorMYSQL(OBM database kind) -
@DBNAME@: OBM database name -
@DBUSER@: OBM database user -
@DBPASSWORD@: OBM database user password -
@EXTERNALURL@: Your OBM FQDN
LDAP Configuration
You have to edit the LDAP configuration file:
/etc/opush/ldap_conf.inisearch.ldap.filter=(&(objectClass=inetOrgPerson) (|(mail=%q*)(sn=%q*)(givenName=%q*)))
search.ldap.url=@LDAPSERVER@
search.ldap.basedn=dc=%d,dc=local
# search.ldap.limit=100And then replace the default value:
-
@LDAPSERVER@: URL of the OBM LDAP server (ldap://… or ldaps://…)
See LDAP for more information.
7.4.2. Configuration of the Cassandra Connection
Opush needs additional configuration in order to connect to Cassandra.
You have to edit the Cassandra configuration file:
/etc/opush/cassandra.inicassandra.seeds=@SEEDS@
cassandra.keyspace=@KEYSPACE@
cassandra.user=@USER@
cassandra.password=@PWD@
# Retry policy values: ALWAYS_RETRY (default), RETRY_OR_CL_DOWNGRADE
#cassandra.retry-policy=ALWAYS_RETRY
# Maximum number of retry (default 3)
#cassandra.max-retries=3And then replace values as followed:
-
@SEEDS@: List of Cassandra seeds (IPs), separated by comas -
@KEYSPACE@: Cassandra keyspace for Opush -
@USER@: Cassandra user for Opush -
@PWD@: Cassandra user password for Opush
7.5. Opush Cassandra Schema Setup
At this step you should have a Opush 3 and a Cassandra cluster installed and configured.
The last thing to do to have your Opush ready to use is to setup the Cassandra schema.
7.6. Opush Restart
$ service opush restart7.7. Opush Service Activation on Boot
$ chkconfig opush on8. Cassandra Schema
8.1. Installation
The first time you will start Opush, opush.log will
contain the following message:
10:49:48.611 [ERROR] {CONTAINER} [t/c/r/] Cassandra schema not installed, starting administration services only8.2. Upgrade
There are two kinds of schema upgrades:
8.2.1. Upgrade Recommended
The following message will be displayed in opush.log:
11:35:43.461 [WARN ] {CONTAINER} [t/c/r/] Cassandra schema not up-to-date, update is recommendedTo upgrade, you should use the schema update CRaSH command. Restarting Opush is not required for this type of upgrade.
| Clients can access Opush even if upgrade is recommended. |
8.2.2. Upgrade Required
The following message will be displayed in opush.log:
11:43:51.857 [ERROR] {CONTAINER} [t/c/r/] Cassandra schema too old, starting administration services onlyFor required upgrades, you should use the schema update CRaSH command and then restart Opush.
| Opush server will not be accessible to clients until restart. |
9. Administration Operation
9.1. Administration with the CRaSH console
CRaSH is a console to administer or monitor an application running on the JVM.
Starting with Opush 2.5.0, Opush integrates CRaSH to provide several administration and debug commands. It is enabled by default and is reachable using an SSH client on port 5665.
9.1.1. Prerequisite: Grant Rights to the Admin Profile
Administration with the CRaSH console applies to every domain thus you must give extra rights to the OBM domain administrators.
|
The consequence is that an OBM domain administrator actions impact the whole server and all domains. |
To grant all rights on domains to an OBM domain administrator, you have to
modify Admin user’s profile.
To achieve this, authenticate with the OBM web interface as an Admin for the
global domain (like admin0), click on Administration, User profiles then
update the Admin profile.
There is a Specific settings section where you can give all rights on the domains line.
9.1.2. Authentication
By default, authentication is done using the global.virt domain. You can change this in the configuration file (see Configuration).
When dealing with a single domain instance, global.virt may not exist.
In this particular case, you have to configure the domain used for authentication (see Configuration).
In order to connect to CRaSH, use the following command to initiate an SSH connection:
$ ssh user@your_server -p portwhere
-
useris an admin user of the corresponding domain -
your_serveris the IP or hostname of the Opush server -
portis the port of CRaSH (default:5665)
9.1.3. Configuration
Initially, the configuration file /etc/opush/remote_console.ini looks like this (default values):
/etc/opush/remote_console.ini# Default parameters
# uncomment lines and modify values to change default settings
#
# console.enable = true
# console.ssh.port = 5665
# console.authentication.domain = global.virtwhere
-
console.enablemay be switched tofalsein order to disable CRaSH -
console.ssh.portis the port used to connect to CRaSH -
console.authentication.domainis the domain used for authentication
9.1.4. Examples
Here is a sample CRaSH session
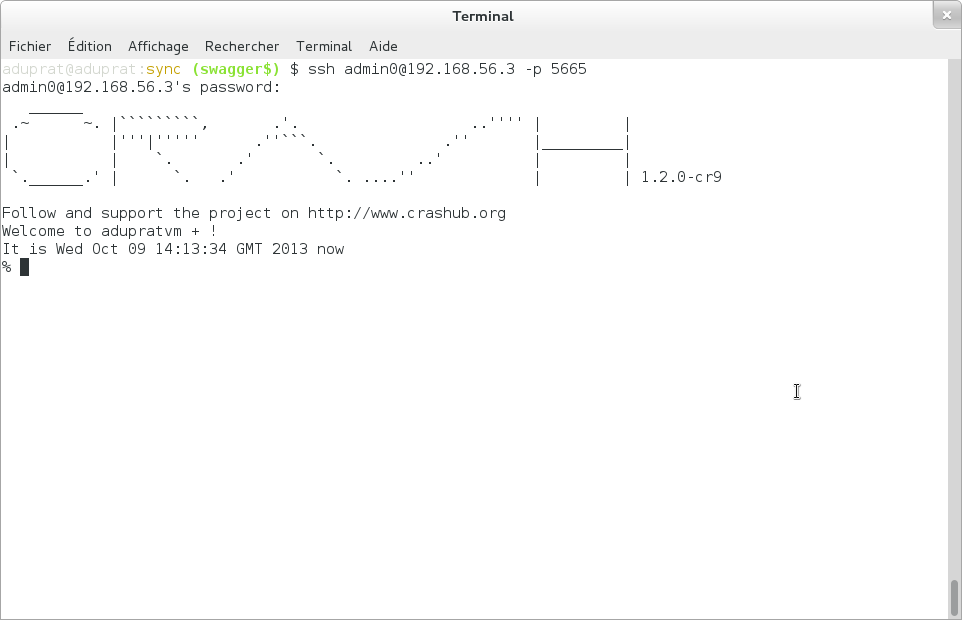
The list of CRaSH commands may be displayed by the help command, a help is also provided for each command with the -h switch.
For more details see the official documentation at http://www.crashub.org/
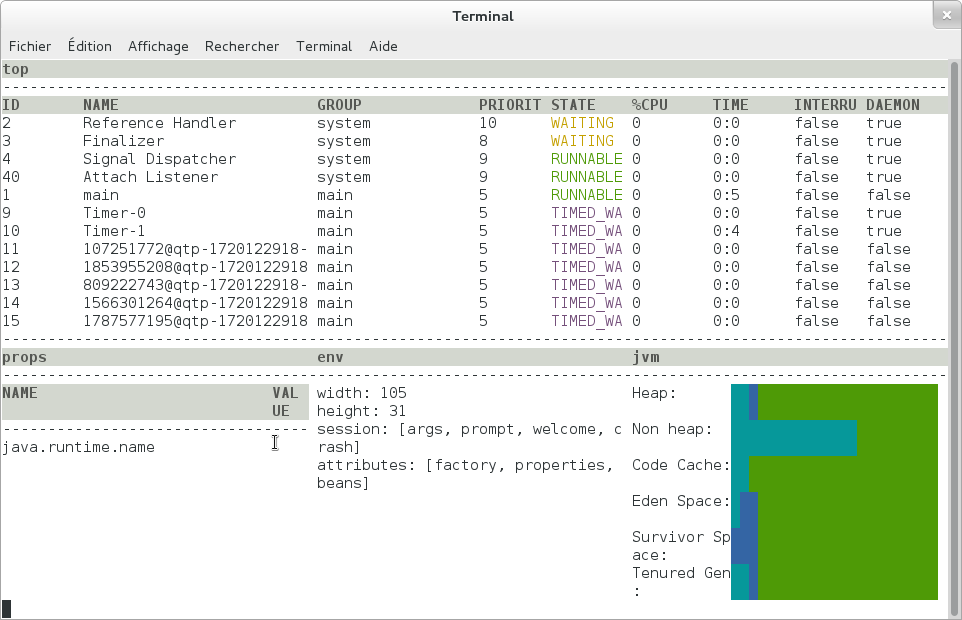
9.1.5. Commands
The main operations of this tool are:
-
monitor the Opush server (
dashboard) -
display the current configuration (
system,jvm) -
handle Cassandra schema installation and update (
cassandra)
Cassandra
schema status
This command shows status information about the schema. It will give a warning if you have not installed the Cassandra schema and inform about optional and mandatory updates.
status output when no schema is installed% schema status WARN: Install required No schema found, you can create it using the "install" command The latest schema version available is 1
status output when schema is up-to-date% schema status OK Your schema is already at the latest version: 1 updated the Wed Mar 26 16:25:53 GMT 2014
status output when an update is available% schema status WARN: Update advised This opush server IS compatible with the current schema but an update is available Current: 1 updated the Wed Mar 26 16:25:53 GMT 2014 Latest : 2
schema install
This command installs a schema on a new Cassandra server. It is intended to be run only after the first Opush installation. You won’t be able to use Opush until the schema is installed
install output% schema install Schema version 1 has been installed, please restart opush to get the service up
schema update
This command will update the Cassandra schema to the latest available version.
update output% schema update Your schema has been updated from version 1 to 2
9.2. Device Reinitialization
Sometimes users may need to reset their devices. This can be done by two different ways in OBM:
-
by obm-ui: the OBM administrator has to delete the mobile device in the dedicated user page
-
by the device itself: the device user has to modify the filter type (synchronization timeframe) in the ActiveSync account settings
Here is a list of devices which are known to be compatible with this operation:
| Device | By obm-ui | By device |
|---|---|---|
HTC HD Mini (Windows Mobile 6.5) |
YES |
YES |
iPhone 4 (iOS 5.1.1) |
YES |
YES |
iPad 3 (iOS 6.0.1) |
YES |
YES |
Samsung GALAXY S (Android 2.3.4) |
YES (need email application or device restart) |
YES |
Samsung GALAXY SII (Android 2.3.3) |
YES (need email application or device restart) |
YES |
Samsung GALAXY SII (Android 4.0.3) |
YES |
YES |
Samsung OMNIA 7 (Windows Phone 7.5) |
YES |
YES |
9.3. Supervision
We supply a probe called Spushnik to supervise your Opush server. See the spushnik documentation for more information.
10. Opush Server Access
10.1. Reverse Proxy
The ActiveSync protocol defines specific URLs on standard https port for
devices to detect configuration and perform general operations. Opush runs
on port 8082, therefore your web server needs to be configured to publish
Opush under the following URLs:
-
https://your_server/Microsoft-Server-ActiveSyncfor general operations -
https://your_server/autodiscover(case may vary) for autoconfiguration feature
Packaging can create the appropriate Apache configuration to publish the Opush
service under this URL. Nevertheless, you sometimes need to manage the reverse
proxy configuration by yourself. In this case, be sure to bind
https://your_apache_server/Microsoft-Server-ActiveSync to
http://your_opush_server:8082/opush/ActiveSyncServlet/ and
https://your_apache_server/autodiscover to
http://your_opush_server:8082/opush/Autodiscover/
autodiscover must be matched case-insensitive.
|
ProxyPass /Microsoft-Server-ActiveSync http://opush.domain:8082/opush/ActiveSyncServlet/
ProxyPassReverse /Microsoft-Server-ActiveSync http://opush.domain:8082/opush/ActiveSyncServlet/
ProxyPassMatch (?i:/autodiscover) http://opush.domain:8082/opush/Autodiscover/
ProxyPassReverse /autodiscover http://opush.domain:8082/opush/Autodiscover/server {
listen 80 default;
server_name _;
location /Microsoft-Server-ActiveSync {
proxy_pass http://opush.domain:8082/opush/ActiveSyncServlet/;
}
location /_autodiscover {
proxy_pass http://opush.domain:8082/opush/Autodiscover/;
}
location ~* /autodiscover {
rewrite ^ /_autodiscover last;
}
}10.2. DNS
When you try to add an ActiveSync account on your device, you must set the
user email address.
When using autoconfiguration feature, the domain part of the
email will be used to find the target server.
It’s necessary to have a DNS server configured to help the phone resolve
this domain.
Some devices prefix the domain by autodiscover.. So you must add the following
entries to your DNS configuration:
YOUR_DOMAIN                     A           YOUR_REVERSE_PROXY_SERVER_IP
autodiscover.YOUR_DOMAIN        A           YOUR_REVERSE_PROXY_SERVER_IP
and for the reverse DNS part:
YOUR_REVERSE_PROXY_SERVER_IP             A           YOUR_DOMAIN
YOUR_REVERSE_PROXY_SERVER_IP             A           autodiscover.YOUR_DOMAIN
11. Advanced Configuration
11.1. Mail Server
Opush needs an IMAP server running and a working IMAP account for every Opush
user.
It also needs a working SMTP server.
11.1.1. Special Folders
ActiveSync defines some special folders: Inbox, Drafts, Sent and
Deleted.
These folders are mapped to default IMAP folders that way:
| ActiveSync folder | IMAP folder |
|---|---|
|
|
|
|
|
|
|
|
You can change these default mappings by defining the following keys in
/etc/opush/mail_conf.ini:
| ActiveSync folder | Configuration key |
|---|---|
|
|
|
|
|
|
| the INBOX folder is not configurable because INBOX always exists as specified by IMAP RFC 3501, section 5.1. |
Character Encoding
Non latin-1 characters are allowed but need special encoding.
You must use the native2ascii tool provided by your JDK.
Given a mail_conf.ini encoded according to your locale, the following command will generate a valid configuration:
$ native2ascii mail_conf.ini /etc/opush/mail_conf.ini11.1.2. Mail Configuration
In addition to folder mapping configuration, there are
several things you can configure about Opush mail handling.
Below is the default /etc/opush/mail_conf.ini file:
imap.activateTLS=true
imap.loginWithDomain=true
imap.timeoutInMs=5000
message.maxSize=10485760
| Configuration key | Value type | Comments |
|---|---|---|
|
|
Opush uses startTLS to secure IMAP connection |
|
|
Opush includes @domain in login for IMAP authentication |
|
|
timeout before Opush gives up an IMAP command |
|
|
Max size allowed when sending a mail |
11.2. LDAP
11.2.1. About LDAP in Opush
In Opush, LDAP is used only for user lookups, depending on the clients requests.
Usually, it is used for recipient auto-completion when the user is writing an email.
|
LDAP is neither used directly by Opush to populate the client address books nor for authentication. These two features are delegated to obm-sync. |
11.2.2. Configuration
The Opush LDAP configuration file is located at /etc/opush/ldap_conf.ini.
| Configuration key | Value type | Required | Comments |
|---|---|---|---|
|
|
True |
The filter expression to use for the search |
|
|
True |
The address where the ldap server can be
reached (we advise to specify the protocol
used, |
|
|
True |
The name of the context or object to search for |
|
|
False |
The max entry count to read from the ldap server (20 by default) |
11.2.3. Troubleshooting
You can check your LDAP configuration by looking at the logs when Opush starts.
You only have to activate the CONFIGURATION logger, for more details check
the logs documentation section.
11.3. Autodiscover
The Autodiscover feature allows devices to detect the correct configuration based on the user’s email address.
This feature requires a secure communication channel between the device and the server.
Although some devices do not require a valid certificate it is highly recommended to set up a valid SSL certificate.
|
Microsoft specifications: |
11.3.1. Device Configuration Steps
Certificate
If you have a certificate signed by a trusted authority, Autodiscover should work out of the box.
For self-signed certificates, you need to import this certificate on each device. Please refer to your device documentation for more details.
Account Creation
-
In the Accounts section of your device, create an Exchange ActiveSync account
-
Configure only your e-mail and your password
-
Your phone should now be configured for your account. That’s all!
Compatibility
| Device | ROM / Version | Compatibility |
|---|---|---|
HTC SAGA SENSE 3.0 |
Orange / Android 2.3.5 |
YES |
IPHONE 4 |
IOS 5.1.1 |
YES |
IPAD 3 |
IOS 6.0.1 |
YES |
SAMSUNG GALAXY S |
Orange / Android 2.3.4 |
NO |
SAMSUNG GALAXY SII |
Orange / Android 4.0.3 |
NO |
SAMSUNG GALAXY SII |
Orange / Android 2.3.3 |
Not implemented by the phone |
SAMSUNG OMNIA 7 |
Windows phone 7.5 |
NO |
11.3.2. Underlying Protocol
A request looks like:
<Request>
  <EMailAddress>chris@woodgrovebank.com</EMailAddress>
  <AcceptableResponseSchema>
    http://schemas.microsoft.com/exchange/autodiscover/mobilesync/responseschema/2006
  </AcceptableResponseSchema>
</Request>
And a response:
<Autodiscover>
   <Response>
      <Culture>fr:fr</Culture>
      <User>
         <EMailAddress>chris@woodgrovebank.com</EMailAddress>
      </User>
      <Action>
         <Settings>
            <Server>
               <Type>MobileSync</Type>
               <Url>https://as.woodgrovebank.com/Microsoft-Server-ActiveSync</Url>
               <Name>https://as.woodgrovebank.com/Microsoft-Server-ActiveSync</Name>
            </Server>
            <Server>
               <Type>CertEnroll</Type>
               <Url>https://as.woodgrovebank.com/Microsoft-Server-ActiveSync</Url>
               <ServerData>CertEnrollTemplate</ServerData>
            </Server>
         </Settings>
      </Action>
   </Response>
</Autodiscover>
| You need to configure your server according to Opush Server Access in order to have Autodiscover working |
11.4. Retry policy on Cassandra
Two retry policies are available on the Cassandra client configuration used by Opush.
/etc/opush/cassandra.inicassandra.seeds=@SEEDS@
cassandra.keyspace=@KEYSPACE@
cassandra.user=@USER@
cassandra.password=@PWD@
# Retry policy values: ALWAYS_RETRY (default), RETRY_OR_CL_DOWNGRADE
#cassandra.retry-policy=ALWAYS_RETRY
# Maximum number of retry (default 3)
#cassandra.max-retries=3You may choose one of those two different policies by changing the cassandra.retry-policy entry:
-
ALWAYS_RETRY: retry the request when a read, write or unavailable timeout is raised.
When a read or a write timeouts, it means that enough Cassandra replicas are up but one of them was too slow to reply.
Opush will retry the same request few times to be sure that its read or write query cannot succeed prior to make the EAS request failing. -
RETRY_OR_CL_DOWNGRADE: like ALWAYS_RETRY on read and write timeout, downgrade the consistency level on unavailable.
This policy allows Opush to switch to failsoft when too many nodes get down in your Cassandra cluster.
When not enough replicas are up to get the QUORUM, Opush will downgrade the request’s CL .
Anodetool repairon dead nodes might be required when the cluster gets back to a healthy state
The cassandra.max-retries entry determines the maximum number of retries applied on the selected policy.
In order to identify when the retry policy is applied, the Opush administrator has to check in the Opush log file (/var/log/opush/opush.log) for such messages logged by the LoggingRetryPolicy logger:
....
[INFO ] {c.d.d.c.p.LoggingRetryPolicy} [t/c/r/] Retrying on write timeout at consistency QUORUM(initial consistency: QUORUM, write type: SIMPLE, required acknowledgments: 2, received acknowledgments: 1, retries: 0)
....
[INFO ] {c.d.d.c.p.LoggingRetryPolicy} [t/c/r/] Retrying on unavailable exception at consistency ONE (initial consistency: QUORUM, required replica: 2, alive replica: 1, retries: 0)
....
12. Logs
Opush generates several log files located at /var/log/opush/:
-
opush.logcontains the main server logs -
access.logcontains the http logs using the Apache default format -
out.logcontains startup and uncatched errors
12.1. opush.log
This file contains important information about Opush operations.
Here is a sample line:
05:26:36.669 [INFO] {IMAP.COMMAND} [t10079/cFolderSync/r942/userlogin@obm.lng.org]:message contentIt’s composed of:
-
05:26:36.669: The time of this log entry -
[INFO]: Log entry level -
{IMAP.COMMAND}: Logger name for this entry -
t10079: Thread id writing this log entry prefixed by t -
cFolderSync: The ActiveSync command name prefixed by c. Here the command was "FolderSync" -
r942: Request id prefixed by "r" -
userlogin@obm.lng.org: User causing this log entry -
message content: Logged data
12.2. Loggers
Opush, like all Java components of OBM, uses a logging API to generate information
useful to developers to investigate bugs. This section documents how to
configure the right log level for your needs as an administrator.
Loggers exist in two forms: named loggers and technical loggers.
Technical loggers have names related to the code they belong to and should
not be enabled by an administrator.
Named loggers help administrators to understand what happens in their server in
order to solve some configuration problem or file a bug report.
Opush will output every log with a level greater or equals to WARN,
regardless of the logger name.
You can enable these named loggers by adding entries in
/etc/opush/logback.xml.
Modifications are taken into account every minute. You can check that everything
is applied correctly by looking at logs in /var/log/opush/out.log.
<included>
        <logger name="AUTHENTICATION" level="INFO" />
        <logger name="REQUEST.FULL" level="INFO" />
</included>
You can use the following logger modules:
-
AUTHENTICATIONfor authentication information -
BREAKDOWNfor execution timings -
CONFIGURATIONfor configuration details, printed at application startup -
CONTAINERfor the HTTP Servlet Container information -
IMAP.COMMANDfor imap conversations -
MAIL.DATAfor the content of emails sent through Opush -
MIGRATIONshows the progression of migrations, it is enabled by default -
OBM-SYNCfor data exchanged between opush and obm-sync web services -
REQUEST.FULLfor requests and responses from and to the server, with sensitive data -
REQUEST.TRIMMEDfor requests and responses from and to the server, without sensitive data -
RESOURCESto see how resources like http client, imap connection and others are created, used then closed for each request -
SUMMARY.INfor a summary of changes contained in an incoming request from the server point of view -
SUMMARY.OUTfor a summary of changes contained in an outgoing request from the server point of view
12.3. BREAKDOWN Logs
Requests execution timings are tracked by Opush. It records the time spent in every category that compose the request life-cycle.
REQUEST:1147 (EMAIL:1095 (CASSANDRA:16, SQL:3, OTHER:1076), CASSANDRA:14, SQL:11, OTHER:27)You have to read the BREAKDOWN log line above as a tree where levels are separated by parentheses.
It is easy to understand with some explanations:
-
REQUEST:1147means that the whole request execution took 1147ms-
EMAIL:1095: in REQUEST, 1095ms have been spent in the EMAIL category-
CASSANDRA:16: in EMAIL, 16ms have been spent in the CASSANDRA category -
SQL:3: in EMAIL, 3ms have been spent in the SQL category -
OTHER:1076: in EMAIL, 1076ms have been spent executing code in the remaining categories
-
-
CASSANDRA:14: in REQUEST, 14ms have been spent in the CASSANDRA category -
SQL:11: in REQUEST, 11ms have been spent in the SQL category -
OTHER:27: in REQUEST, 27ms have been spent executing code in the remaining categories
-
Interpretation of these values can be useful to understand performance metrics of your Opush server.
What is interesting in this example is OTHER:1076, it means that 1076ms has been spent in unnamed code category of EMAIL.
It might be the imap server taking very long to process the Opush requests.
There are few fundamental rules that can be considered for better performance analysis:
-
The first category is always REQUEST
-
Duration of a category is always the sum of its children
-
A branch of the tree can only have one occurrence of each category
-
Children of a category are ordered by descending duration except for the
OTHERentry that is always the last
12.4. SUMMARY.* Logs
A summary log looks like this :
11:46:03.976 [INFO ] {SUMMARY.OUT} [t106/cSync/r164/user@domain] CHANGE: 10, DELETE: 2, FETCH: 0The three fields are always present even when the actual value is 0.
-
CHANGEcounts the added or changed objects -
DELETEcounts the removed objects -
FETCHcounts the retrieved objects
This log is written for every request that retrieve or modify some data.
13. Upgrades
3.0.0 to 3.0.1
-
Upgrade Opush, the service will not be available at the restart as it requires a schema update
-
Connect the CRaSH console
-
Update the schema then exit the console
-
Restart Opush and you’re done
-
After one month you can empty (do not drop it!) the previously used column families with the OP-56 issue. Connect Cassandra with the
cqlshshell then empty them.
$ cqlsh -u cassandra -p cassandra NODE_RPC_ADDRESS
cqlsh> TRUNCATE OPUSH_KEYSPACE.monitored_collection;
cqlsh> TRUNCATE OPUSH_KEYSPACE.synced_collection;
| Key | Summary |
|---|---|
QUORUM is our default ConsistencyLevel |
|
Use latest OBM libs as dependencies |
|
Opush 3.0 does not store anymore plain password in database |
|
Log a summary of changes done by each ActiveSync request |
|
Reduce the number of thread jetty use during tests |
|
Access log files should be gz compressed as other logs |
|
Support any keyspace name |
3.0.1 to 3.0.2
-
Upgrade Opush, after its restart the service will be available as it includes a strongly recommanded but optional migration (see OP-84 in the list below)
-
Connect the CRaSH console
-
Run the schema update command
-
Be aware that this operation can be long to finish depending to the amount of data in your cluster, you can see the progression in
opush.logby the loggerMIGRATION -
Note that you don’t have to restart Opush once the migration is done
|
Information about this migration
|
| Key | Summary |
|---|---|
Render the cassandra client read timeout configurable |
|
Support Cassandra 2.1 |
|
Passwords should be logged as * in all logs |
|
An allday event created on iOS is created the day before |
|
Return HTTP 401 only when there is a real auth issue |
|
Ensure that data inserted into cassandra expire |
|
ItemOperation supports email deletion |
|
Support for attachments of attached emails |
|
Add SQL indexes for faster device deletion |
|
Fix a file-descriptor leak in the CRaSH console |
|
Fix a file-descriptor leak in spushnik |
|
Fix a file-descriptor leak in a Opush servlet |
|
Avoid global status error on sync |
|
Limit the LDAP search results number |
3.0.2 to 3.0.3
| Key | Summary |
|---|---|
OPush is now able to synchronize collection containing more than 65535 items |
|
The "days to sync" option is now respected |
3.0.3 to 3.0.4
| Key | Summary |
|---|---|
Reply to an email with no charset defined works now perfectly |
|
No more errors with users without IMAP Sent folder |
|
A deleted occurence on a smartphone is now correctly deleted in Thunderbird calendar too |
|
Invalid ServerId in incoming requests are now handled |
|
Useless HTML tags are no longer displayed in the preview of iOS devices |
3.0.4 to 3.0.5
| Key | Summary |
|---|---|
Respect the clientId for contact creation to avoid duplication |
|
Repare Cassandra reconnection behavior after a network failure |
3.0.5 to 3.0.6
| Key | Summary |
|---|---|
Protect OBM about contact duplication |
The changeset provided by OP-139 aims to protect the backend about contact duplication.
That protection is implemented using the hash of every contact created by a device.
When a contact hash is already known by Opush, it’ll not send the creation command to its backend.
This fix has been done to handle the never fixed "ClientId" bug of Android, see https://code.google.com/p/android/issues/detail?id=61100
3.0.6 to 3.1.0
-
Some SQL tables will not be used anymore, Opush will instead store its data in Cassandra. Those tables are
opush_folder_mapping,opush_folder_snapshotandopush_folder_sync_state. -
The foreign-key constraint
opush_sync_state.collection_idwill be dropped -
As usually the migration steps are:
-
Install Opush 3.1.0
-
Connect the CRaSH console
-
Run the schema update command
-
Restart Opush
-
Well done, you’re up-to-date!
-
|
Be aware that due to OP-53, every device will forget its data, synchronization states will be reinitialized from scratch for everybody |
| Key | Summary |
|---|---|
Features |
|
Mailboxes are now displayed as a tree |
|
Set the display name of the sender on emails sent by Opush |
|
Devices are now able to create an IMAP folder |
|
Bug fixes |
|
Repair contact creation on some Androids |
|
Always respect the "synchronize all items" option |
|
Item changes are not skipped anymore when many modifications are discovered at the same time |
|
Ability to reduce the max WindowSize from server side |
|
Limit the amount of data retrieved by IMAP on only attachments emails |
|
First attachment of only attachments emails is no more skipped |
|
More elegant first synchronization on Androids |
|
Restore the Windows Phone synchronization capability |
|
Allday event date can be moved on the device when something modified by obm-ui |
|
Cassandra |
|
Retry a Cassandra query when a timeout is encountered |
|
Failsoft capacity when too many nodes are down to get the QUORUM |
|
Packaging |
|
LSB compliance of the "status" command |
|
Installation using the "noninteractive" mode is now supported |
|
Folders deletion is done when opush and opush-conf packages are purged |
|